

How To Use An Iphone 8
Did you just get a shiny new iPhone 8 or 8 Plus. Nice! Before you head out to take a squillion photos or plop it down on your new wireless charging pad, there are a few housekeeping details you should tend to first.
1. Back up and restore
This isn't poor planning, we swear—it's a good idea to back up your old phoneafter you have your new iPhone in hand, so the backup is as up-to-date as it can possibly be. You can back up via iCloud or on a Mac.
iOS has a feature called Quick Start that uses your old iPhone to set up your new one. You can still use Quick Start (and if that's what you want to do, skip to number 2 below), but it's still a good idea to back up your old iPhone first. You don't have to use Quick Start, though. Here are instructions on how to back up your old iPhone and then use that back up to set up your new iPhone.
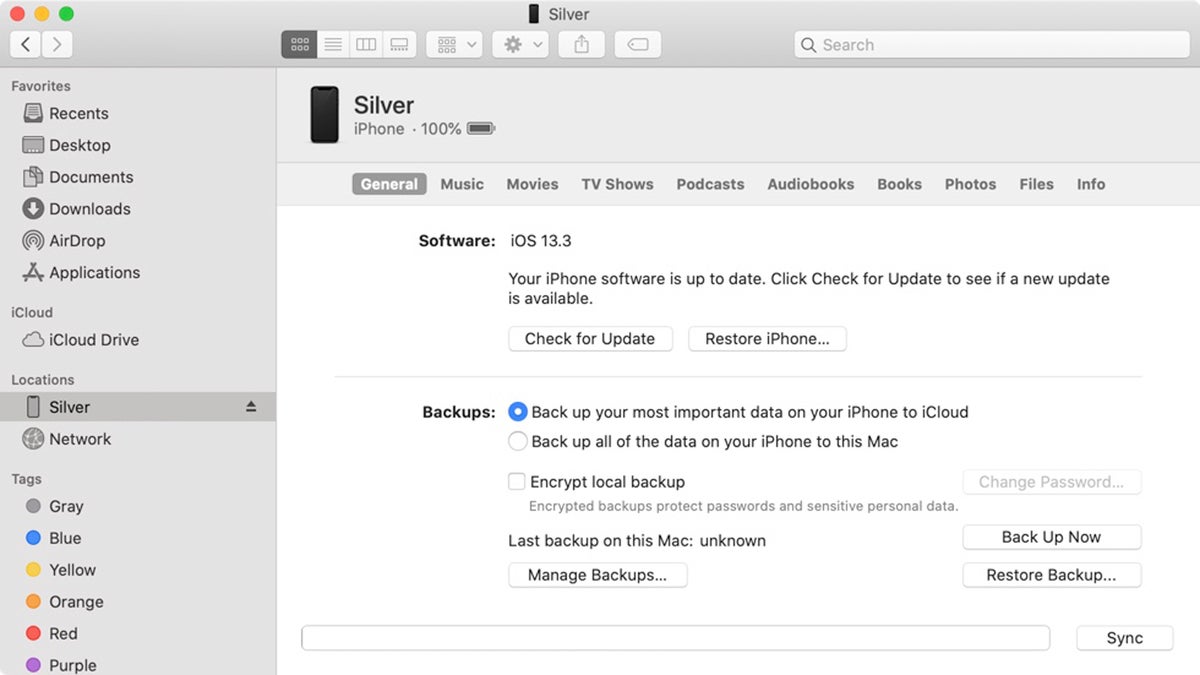
For a Mac backup (macOS Catalina): Connect your old iPhone to your Mac, open a new Finder window, and select your iPhone in the left column in the Locations section. You'll see a window that looks like the iPhone management window that used to be in iTunes. In the Backups section, choose,Back up all of the data on your iPhone to this Mac. CheckingEncrypt local backup is a good idea, so your account passwords and Health data gets backed up too—just choose a password you won't forget. Click the button toBack up now.
 IDG
IDG In macOS Catalina, you can access your iPhone through the Finder.
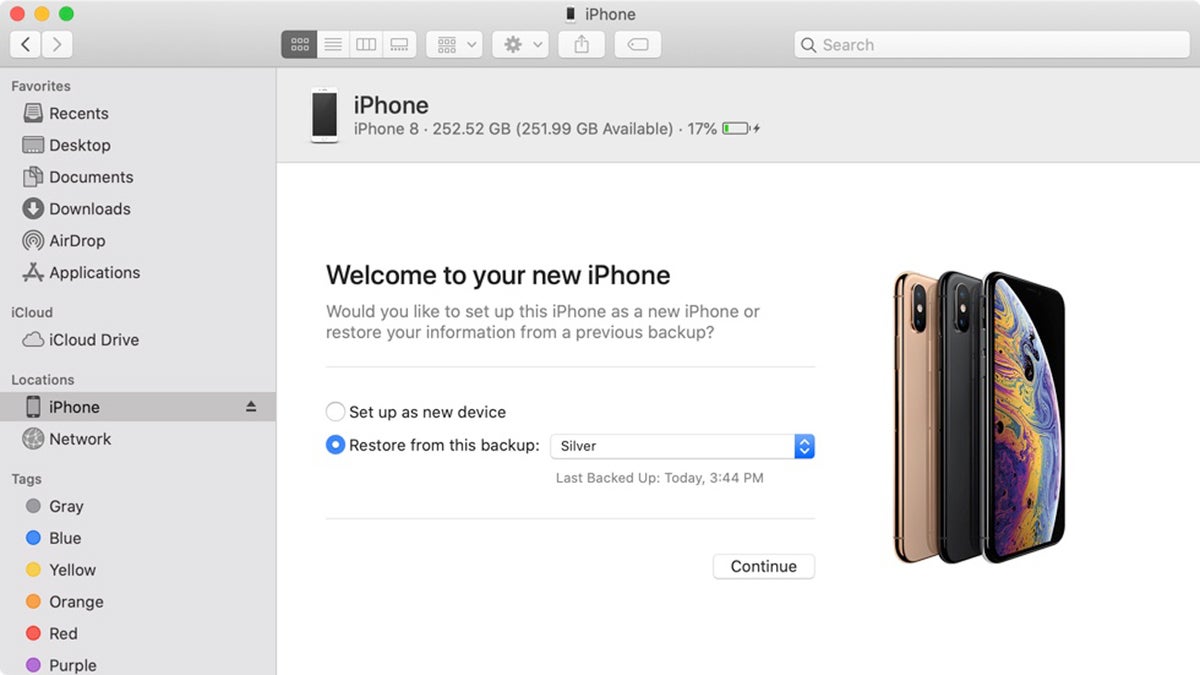
When the backup is done, connect your new iPhone 8, then tell your Mac you want to restore from the backup you just made. Later, you can switch back to iCloud backups if you prefer, inSettings > iCloud > Backup. But it never hurts to run a backup on your own Mac every now and then.
 IDG
IDG You can use a backup of an old iPhone to set up a new one.
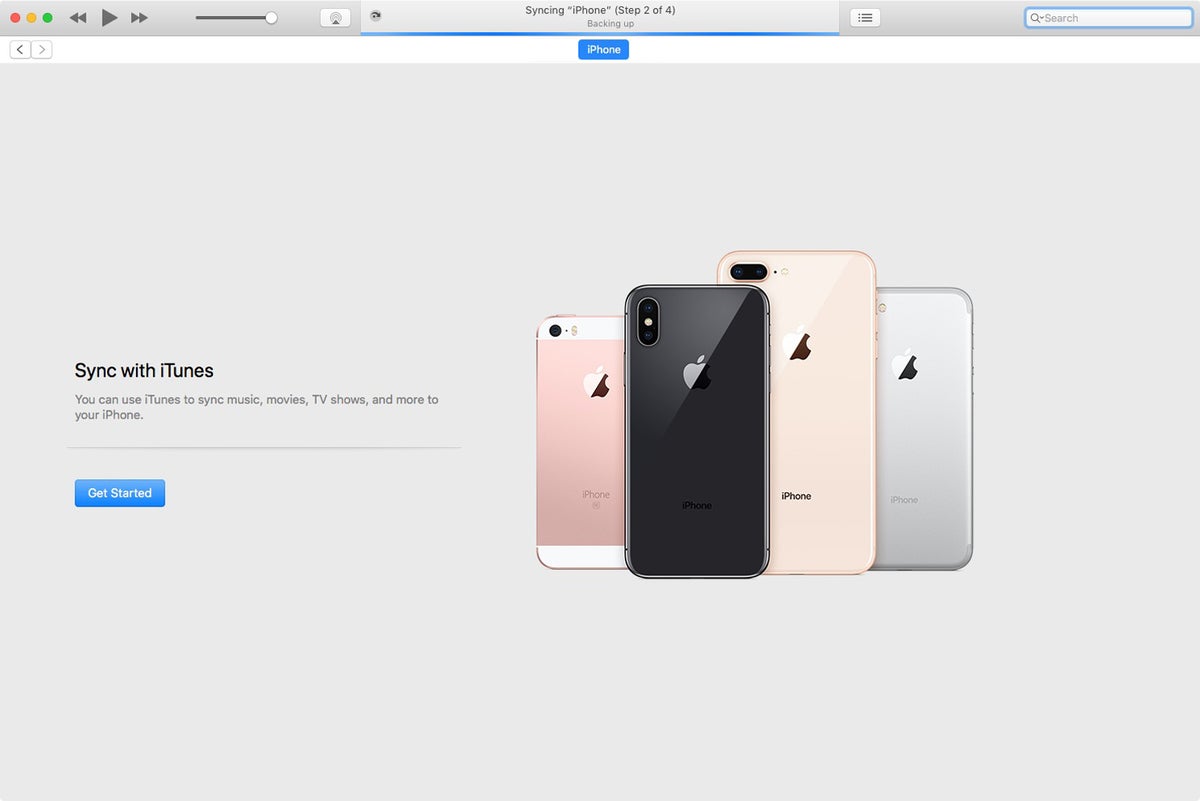
For a Mac backup (macOS Mojave or older): The backup process is similar to that described above for Catalina, but instead, you use the iTunes app. After you back up your old iPhone, connect your new one. iTunes will take you through the steps for set up.
 IDG
IDG In versions of macOS before Catalina, you use iTunes to set up your iPhone.
For an iCloud backup: No need to connect your old iPhone to your Mac. Just launch Settings and tap on your Apple ID profile listing at the top, then go to iCloud > iCloud Backup and select Back up now.
When setting up your new iPhone 8, you can restore your iPhone from this backup once you've logged into your new device with your Apple ID.
2. Quick Start
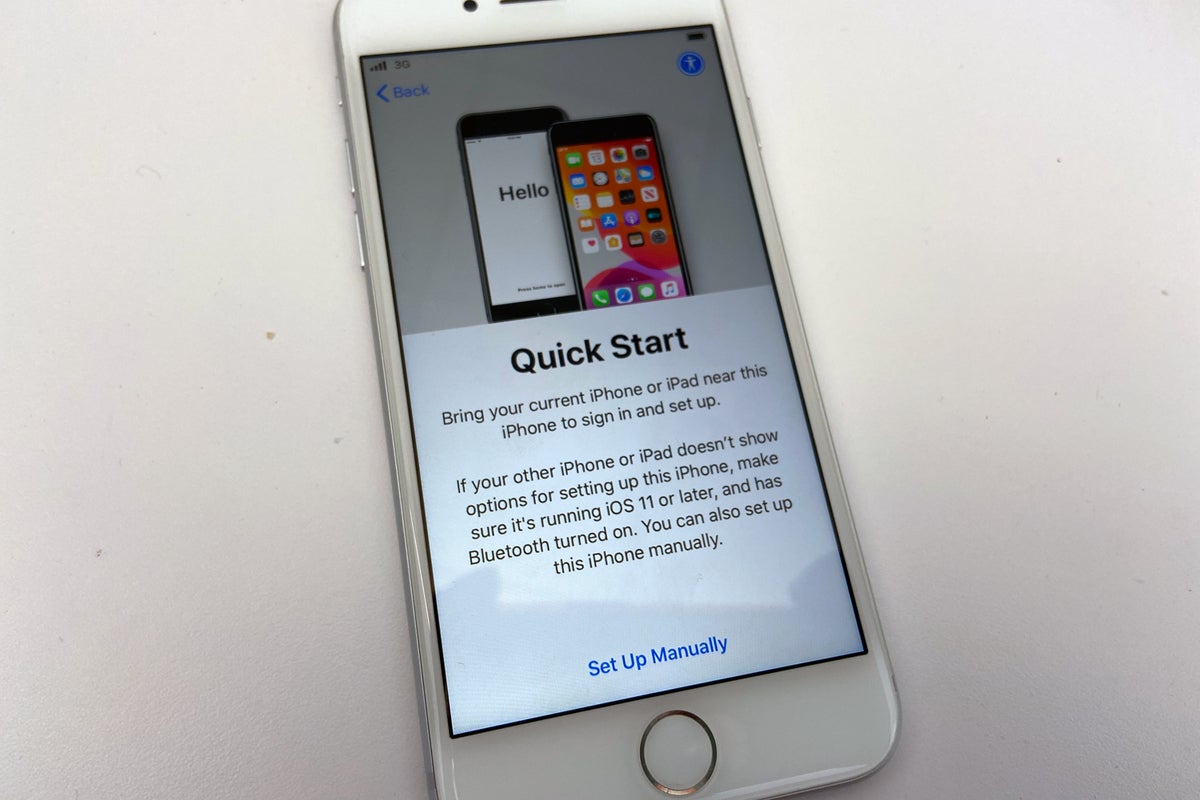
Quick Start is a way to set up your new iPhone without using your Mac. You can use Quick Start instead of the method describe in number 1 above. Before using Quick Start, have your old iPhone nearby, since it'll be used to set up your new iPhone. If you don't want to transfer the apps and settings from the old iPhone to the new one, you can do a manual Quick Start set up, which we'll get into in a bit.
 IDG
IDG Most people will use Quick Start to set up their new iPhone.
When you start you new iPhone 8, it greets you with a Hello screen. After you press the Home button to open the iPhone, you will be asked to pick a language. After that, you need to select your country or region.
Now the Quick Start screen appears. Here's how to set up your new iPhone.
Transfer data from old iPhone to new one.After the Quick Start screen appears on the new iPhone, you should see a Set Up New iPhone screen on your old iPhone. On the old iPhone, tap Unlock to Continue if your phone is locked. Then tap the Continue button.
 IDG
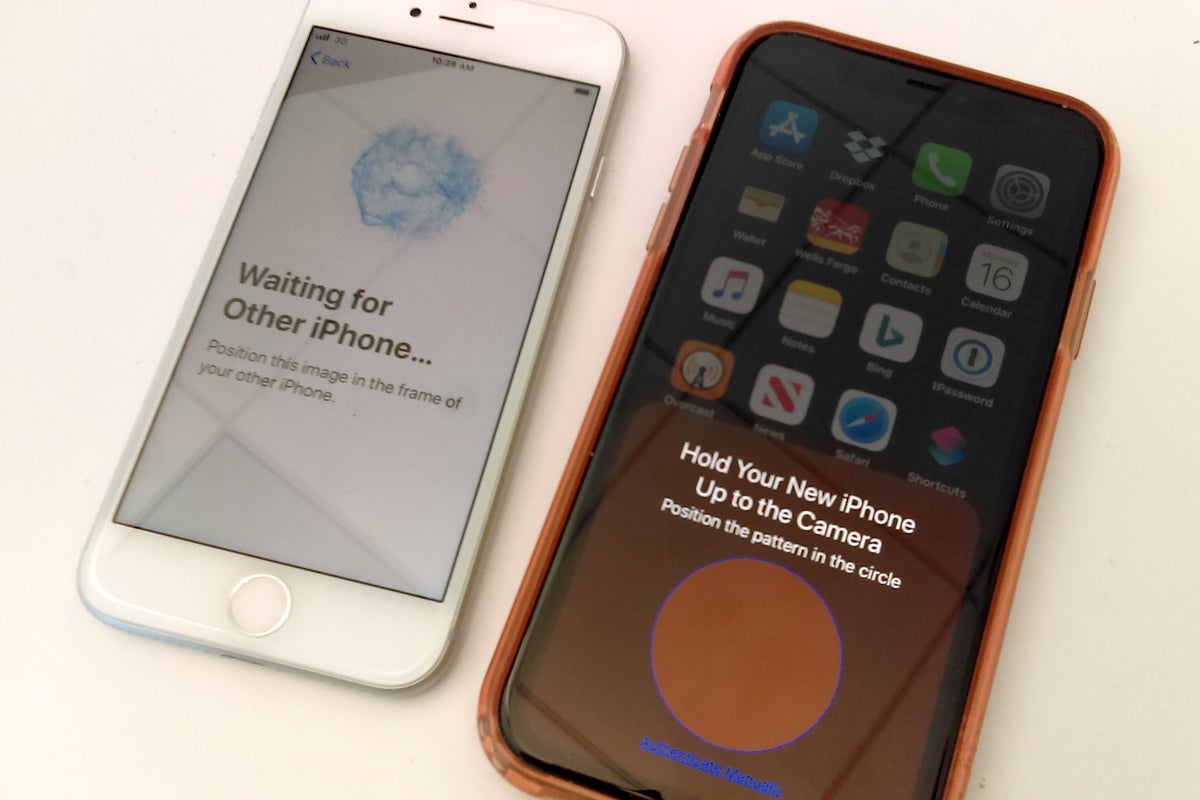
IDG You'll use the old iPhone (right) to set up the new one.
On your old iPhone, you'll see a screen with a big circle labeled, "Hold Your New iPhone Up to the Camera." On the new iPhone, you'll see a screen called, "Waiting for the Other iPhone…" Take the old iPhone and use the camera to position the cloud of blue pixels on the new iPhone in the center of the circle. When the old iPhone senses the pixels, it'll automatically continue the setup. On the new iPhone, you need to enter the passcode of the old iPhone.
Set up the new iPhone as a new phone and don't transfer data from an old iPhone.When the Quick Start screen appear, tap the Set Up Manually link at the bottom. On the next screen, select a Wi-Fi network. After your iPhone is authenticated using the Wi-Fi network, follow the steps to set up the iPhone. At the Apple & Data screen, select Don't Transfer Apps & Data if you don't want to do so.
3. Set up Touch ID and Apple Pay
Yes, you should use Touch ID for maximum security—it's the quickest way to unlock your iPhone, and will let you set a more complicated passcode, since you don't have to type it in every time. So you should take the few moments to repeatedly press a finger on the Home button to register it.
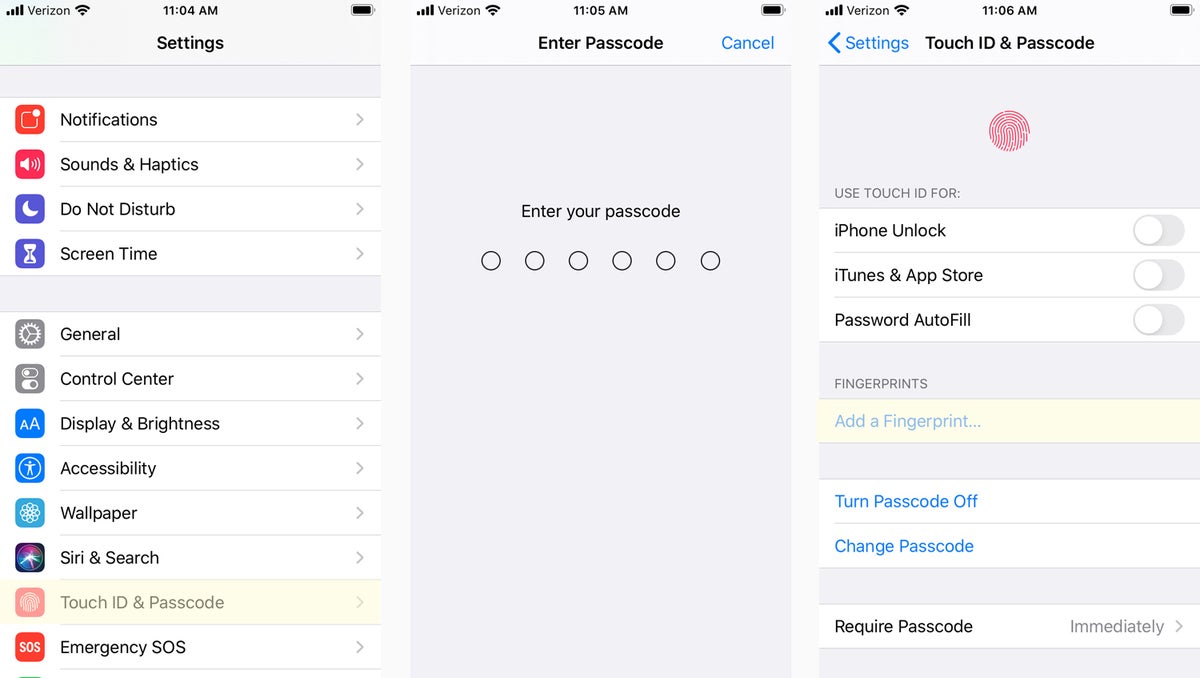
If you trust another human to unlock your phone, you can add their finger (or more of your own digits) by going toSettings > Touch ID & Passcode > Add a Fingerprint.
 IDG
IDG You can add fingerprints to Touch ID—including the fingers of other people.
Since you need to have Touch ID enabled in order to use Apple Pay, this would be a good time to jump into Apple's Wallet app to set that up. If you're new to Apple Pay, just follow the instructions within Wallet to add a credit card or two. If you already had Apple Pay on an older iPhone, you'll notice that your credit cards have disappeared on your new iPhone. Why? For your security, of course. Your Wallet history will still be there, but you'll have to re-enter any payment cards you'd like to use with Apple Pay. (For more on Apple Pay, check out our complete guide.)
4. Choose the Home button's feel
The Home button is not a separate cut-out button that moves down when you press it. It's completely fused with the rest of the iPhone's chin, so it no longer physically moves up and down. You can still find it with your thumb thanks to the metal Touch ID ring that surrounds it.
 IDG
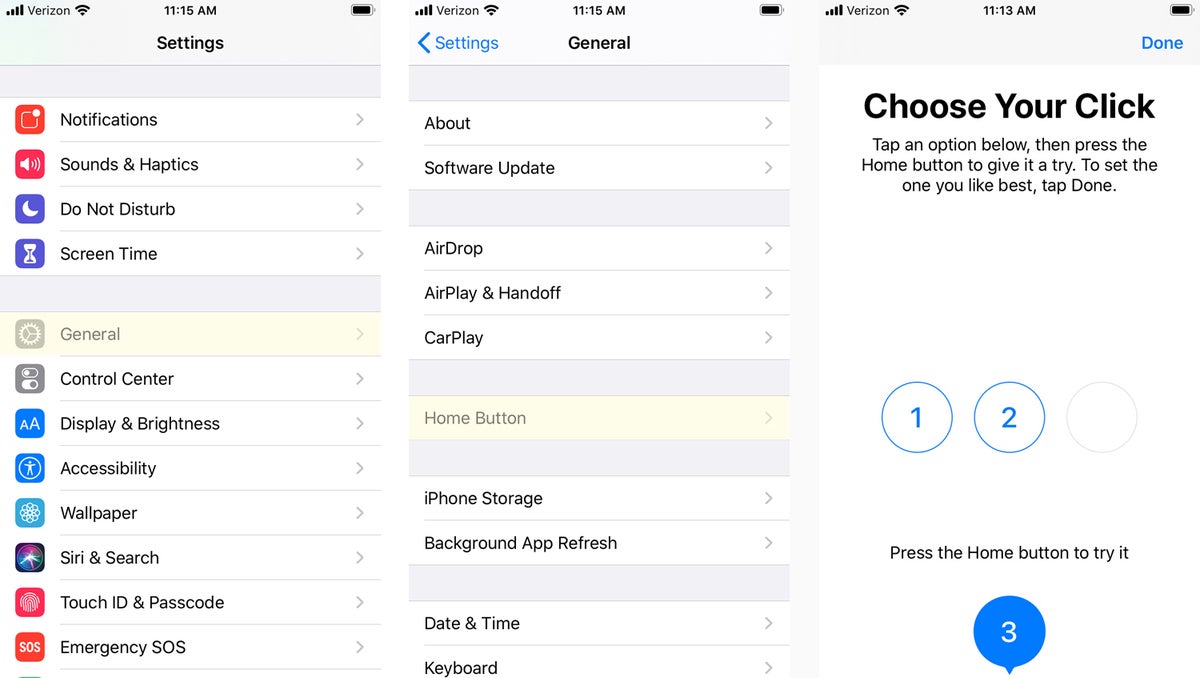
IDG You can adjust the feel of the Home button at any time.
When you press the Home button, however, you'll still feel a vibration from the Taptic Engine, so it feels like you're clicking. If you set up your iPhone 8 as a new phone, you get to choose how the Home button should feel. iOS offers three click "feels" you can choose from. On this screen, tap the 1, the 2, or the 3, and then press the Home button to feel the difference between those clicks. Pick the one you like the best, and then tap Next at the top-right. If you want to change it up later, just visitSettings > General > Home Button.
5. Update your apps
Great, now you should be on your home screen at last. Hit up the App Store first—you'll want the latest versions of all of your apps. While you're there, check out the collections of cool apps curated in magazine-style articles, interviews with up and coming app developers, game trailers, and more goodies over in the Today section. This changes, er, daily, so you can come back tomorrow to see what else is new.
 Apple
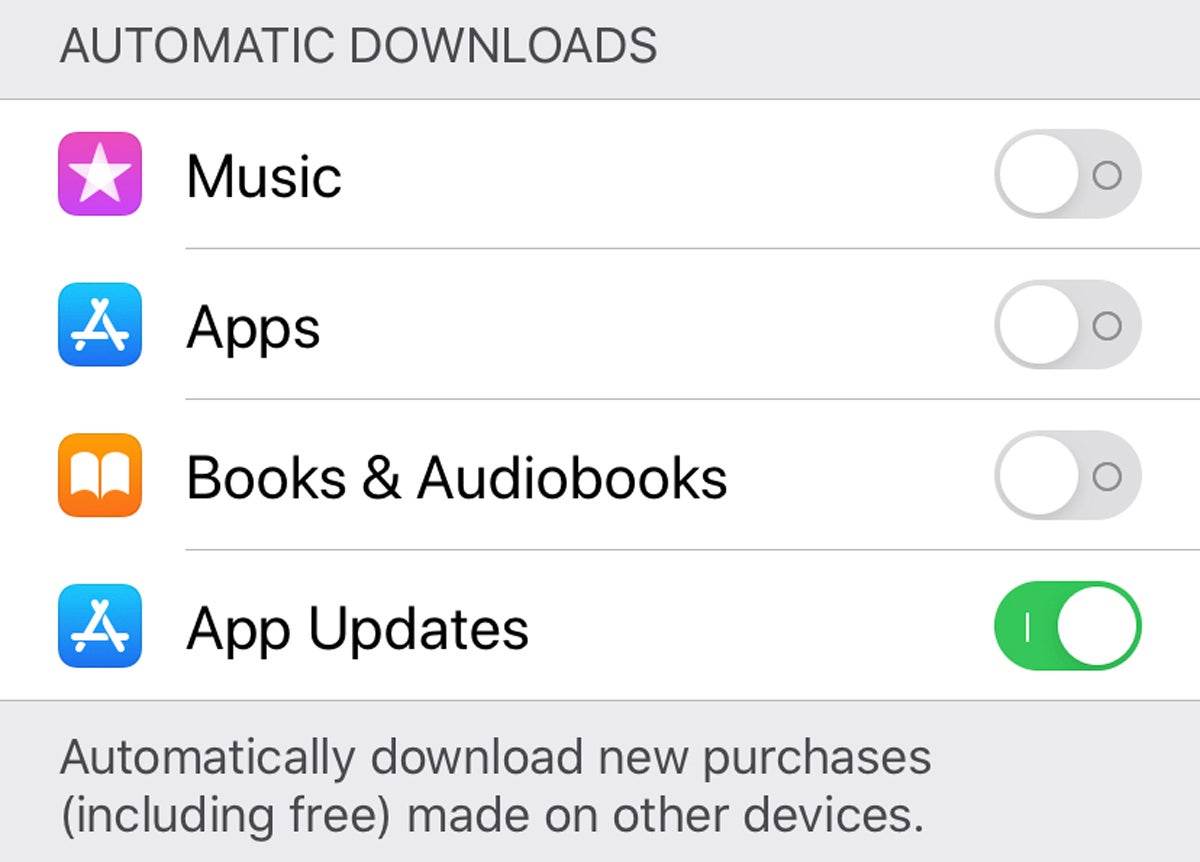
Apple Setting the App Store to automatically update apps will make sure you always have the latest versions with the latest features and bug fixes.
Don't forget you can have your apps auto-update by flipping the Updates switch inSettings > your Apple ID > iTunes & App Store. Or, you can manually update your apps in the App Store; tap your account icon in the upper right of the App Store app, and then scroll down to the Available Updates section.
6. Pair your Apple Watch
If you use an Apple Watch (or maybe you just bought a brand new Apple Watch) you'll need to pair it to your new iPhone to keep the Activity data flowing to your Health database, and keep your new phone's notifications flowing to your watch. First you have to unpair your watch from your old iPhone. In the Apple Watch app on your old iPhone (tap your watch, then the "i" icon, thenUnpair Apple Watch, then enter your iCloud password when prompted).
Then, launch the Apple Watch app on your new iPhone 8, which will walk you through the pairing process including setting a passcode, unlocking behavior, and Apple Pay.
7. Try the camera
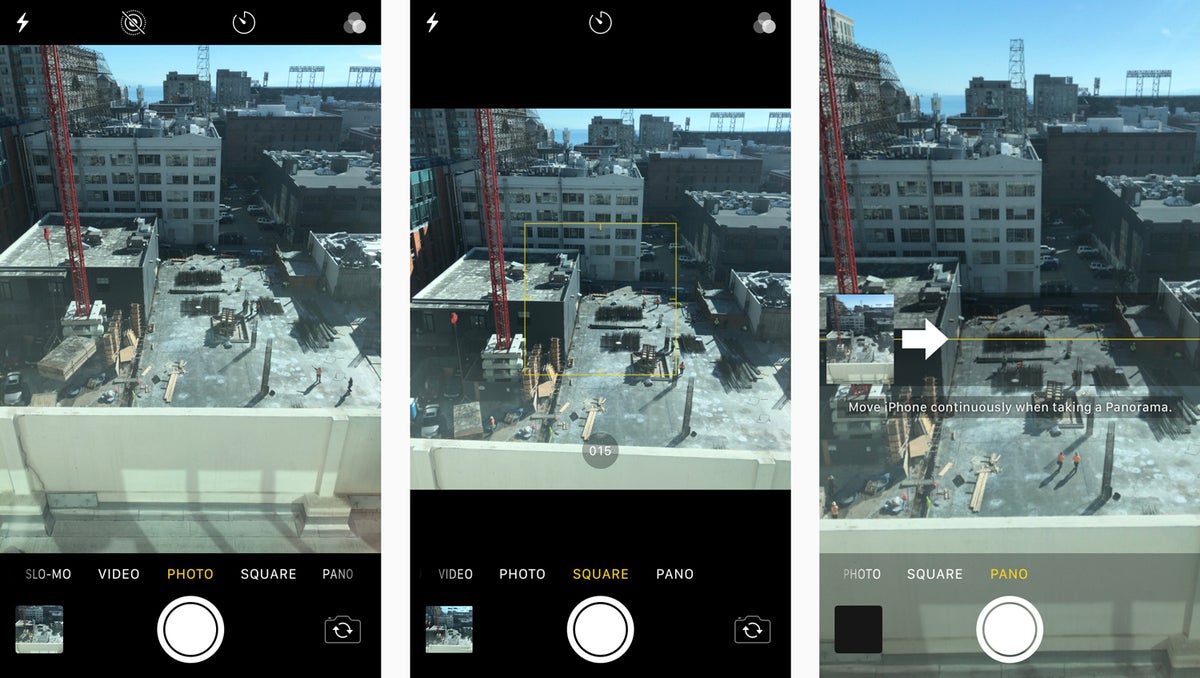
Be sure to familiarize yourself with the different camera modes. Play with the Time-Lapse and Slo-mo cameras, shoot a few videos, check out the regular Photo camera, as well as the Square and Pano cameras.
 IDG
IDG from left to right: regular Photo mode, Square mode, and Pano mode.
8. Edit a Live Photo
In the Camera app, turn on Live Photos by tapping the little icon that looks like a firework (middle left, between the flash icon on the far left and the timer icon on the middle right), in the top toolbar when you're in regular Photo mode. It'll glow yellow when it's enabled. Then when you take a photo, the iPhone will capture 1.5 seconds of video before and after it, so hold the phone steady for best results.
To see your Live Photos in action, you'll find them among your regular photos in the Photos app. When you swipe through your pics, the Live Photo animation will show for a split second, and then stop. To see the whole thing, 3D Touch on the Photo by pressing firmly and holding on the pic.
To edit a Live Photo, tap the Edit button. You can crop them, add a filter, adjust colors and lighting, or even use the magic-wand auto-adjuster at the top-right. You can also trim your Live Photo for time.
9. Customize your Control Center
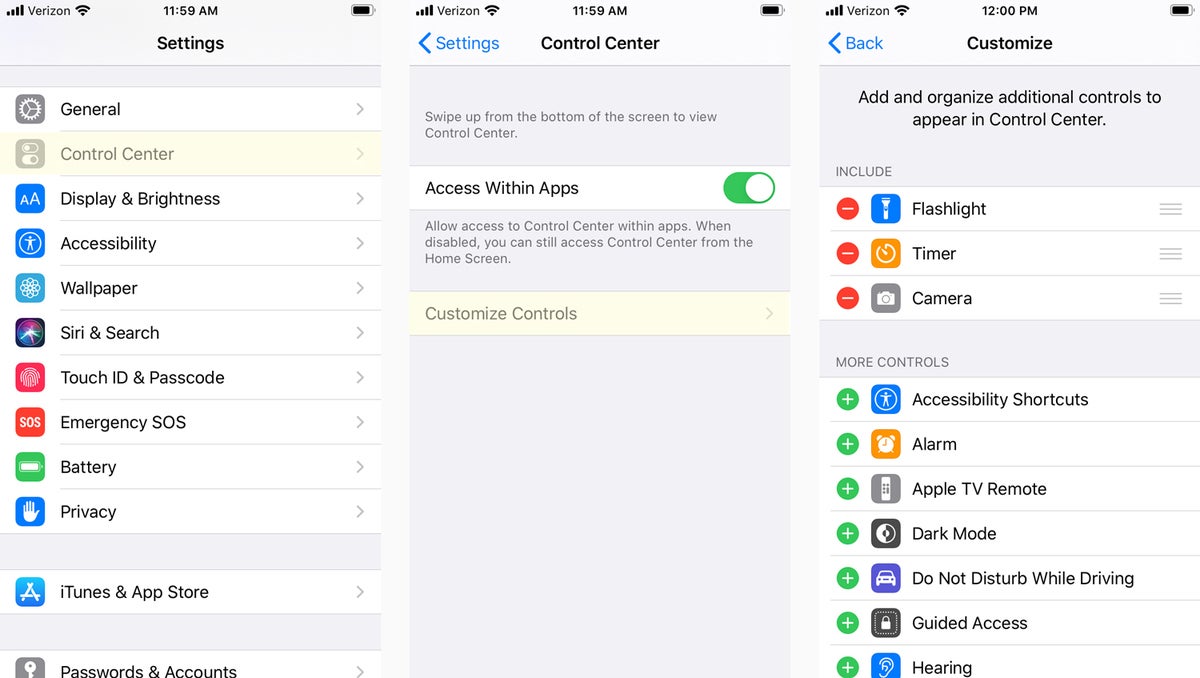
Control Center gives you quick access to a few iPhone functions and apps, including the camera, flashlight, calculator, and alarm clock. You'll also find two sliding controls for your volume and screen brightness, plus toggles for rotation screen lock, Do Not Disturb, screen mirroring, and all of your wireless controls (like Bluetooth, Wi-Fi, and Airplane Mode).
 IDG
IDG Make sure you take advantage of Control Center by adding the apps and features to which you will want quick access.
You access Control Center by swiping up from the bottom of your Home screen. Head on over to Settings > Control Center > Customize Controls, and add any feature that sounds interesting.
For more on what Control Center can do, check out our deep dive.
10. Charge it up
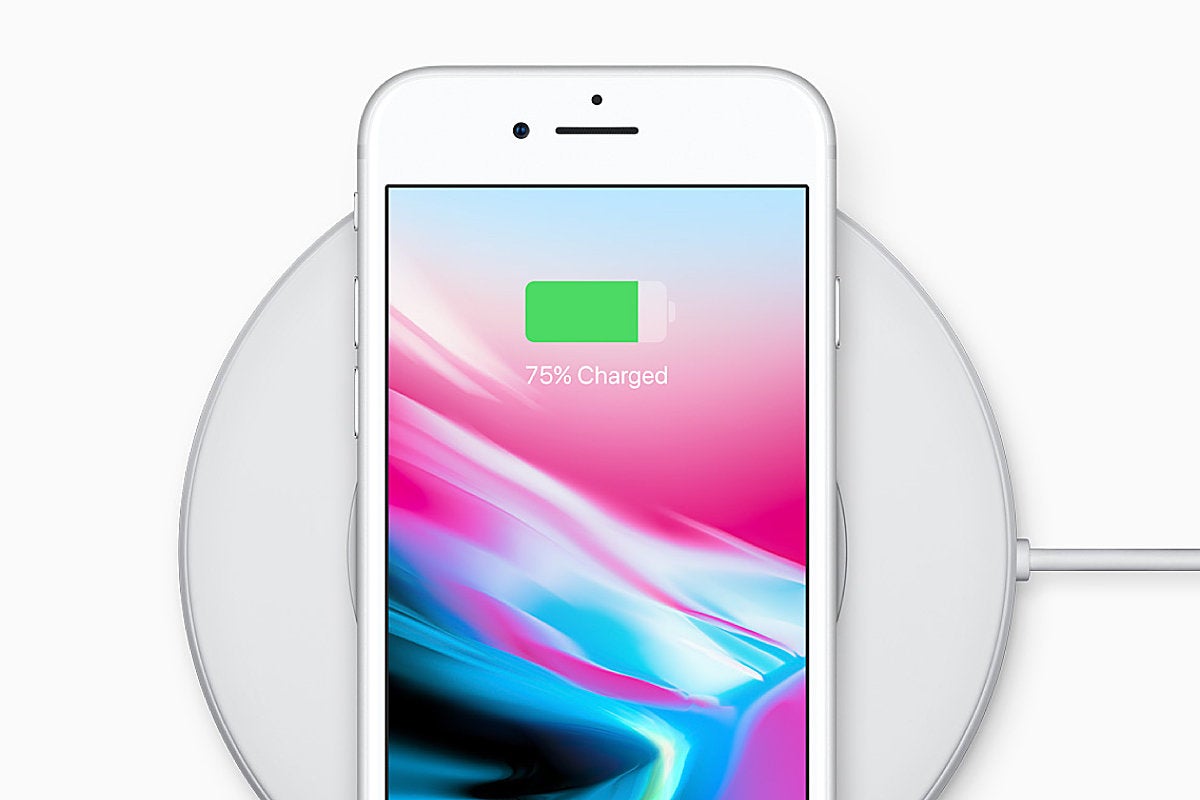
There's a reason your new iPhone 8 has that shiny glass back, and that's not because it's a throwback to the iPhone 4. No, that glass back is for wireless charging support. To use this feature, you'll need a compatible wireless charging pad that utilizes the Qi standard (Apple sells two—one from Belkin and one from Mophie). If you have one of those laying around, all you have to do is set your iPhone onto the pad and watch it start to power up. Say goodbye to the jumble of Lightning cables on your bedside table!
You can learn more about wireless charging on the iPhone 8 by reading our guide.
 Apple
Apple Charge it up!
Of course, you can charge your iPhone 8 via Lightning if you want to—in fact, this still might be the fastest way to charge your phone… for now, at least.
11. Call your mom
Or someone else you love. We're sure they'd be glad to hear from you.
How To Use An Iphone 8
Source: https://www.macworld.com/article/230529/iphone-8-and-8-plus-setup-guide.html
Posted by: connersooking.blogspot.com
0 Response to "How To Use An Iphone 8"
Post a Comment